WARNING: Prior to doing anything, I would like to let you know that I am not responsible for any damage to your device. Make modifications to your device at your own risk. By continuing with these steps, you will void the warranty on your device. It is a good idea to take a complete backup of your phone in case you need it.
Android is the most widely used mobile operating system. It has grown up a lot over the years. Due to the open-source nature of Android, it has allowed many developers to modify their devices in a way they want. One of the most basic modifications in an Android device is to get root privileges.
So, what is root privilege?
I don't care. Take me straight to the tutorial.
If you really care, continue reading.
In layman's terms, root privilege is an extra privilege in your phone which allows you to access and modify the things which were not supposed to be modified by default. Being more technical, the Android operating system is based on the Linux operating system. The term "root" came from Linux OS which is an administrator account with unrestricted access to all commands and files in the system. Rooting an Android phone implies the same. It means to get unrestricted access to the Android system like deleting system files and apps, customizing the default system behaviours, CPU overclocking, battery optimizations and many more.
How can we get root privilege?
There are multiple ways to get root privilege in Android phones. Three years ago, I had posted a similar article on rooting your Android phone using a traditional method. The post is available here if you are interested. The traditional method is still strong and works just fine. But it has some limitations which make it less effective. But again, the method still does whatever it was supposed to do.
The traditional method includes rooting your phone with SuperSU (Short for Super User). SuperSu is a system administration tool which alters the system files in Android to provide users with elevated privileges. The new and better method I will be describing here is using Magisk (Short for Magic mask) manager.
Why Magisk?
Both the ways of rooting Android provide users with root privileges. But the way they achieve it is very different. The main difference is System root and Systemless root. The System root method used by SuperSU involves altering the system files to get root access. It completely changes the files in the system partition and also adds some files to achieve root access.
It was okay to modify files before Android 6 as there were no mechanisms to check tampering of system files in Android. Since Android 6 (Marshmallow), every new Android contains a security check mechanism known as SafetyNet which detects if any system files have been modified. Due to which the phone no longer gets official system and security updates as the system is now unauthorized. Also, some of the apps such as banking apps do not work due to possible security issues.
In contrast to SuperSU, Magisk provides root privileges systemlessly. It means that it doesn't modify any system files to achieve root access. Instead, it patches the system boot file and virtually overlays on the top of the original system files. The system files are kept intact due to which SafetyNet doesn't detect any file tampering. With Magisk, the system modification is fully hidden, and devices can get official updates regularly with uninterrupted functioning of installed apps.
Are there any other differences?
Yes, there are some more noticeable differences between SuperSU and Magisk besides their way of achieving root. Here is a brief comparison:
- Magisk is an open-source tool that is the source code behind Magisk is available to review for all while SuperSU is a closed sourced tool.
- Magisk has an easier installation process and is less confusing. It is comparatively light weight, faster than SuperSU and has wider device compatibility.
- Magisk has a concept of modules which can be installed as addons on the system after installing Magisk. The Magisk modules can tweak different things in the system. Magisk Modules itself is a topic for another day.
How to get root privileges with Magisk?
The main topic for this article is getting root access with Magisk Manager. Magisk manager is an administrative management application which is used to get root privileges with Magisk. There are multiple ways to install Magisk on your phone. The one way I am describing here will be simple and easy to follow. I will guide you through steps to install it. To continue with the steps, you need to have the following:
- A PC with Internet access
- Obviously, an Android phone with Android 4 or above
Will your personal files get damaged? - NO but it is not guaranteed. Taking a backup is a good idea.
To get started, download and install Odin (For Samsung) or similar flashing tool (For other brands) on your PC or you can use ADB (What is ADB? Do some hard work. Google it.). The main purpose of installing Odin is to install TWRP (Team Win Recovery Project). TWRP is an open-source custom recovery image for Android. It replaces stock recovery options in Android with extended features.
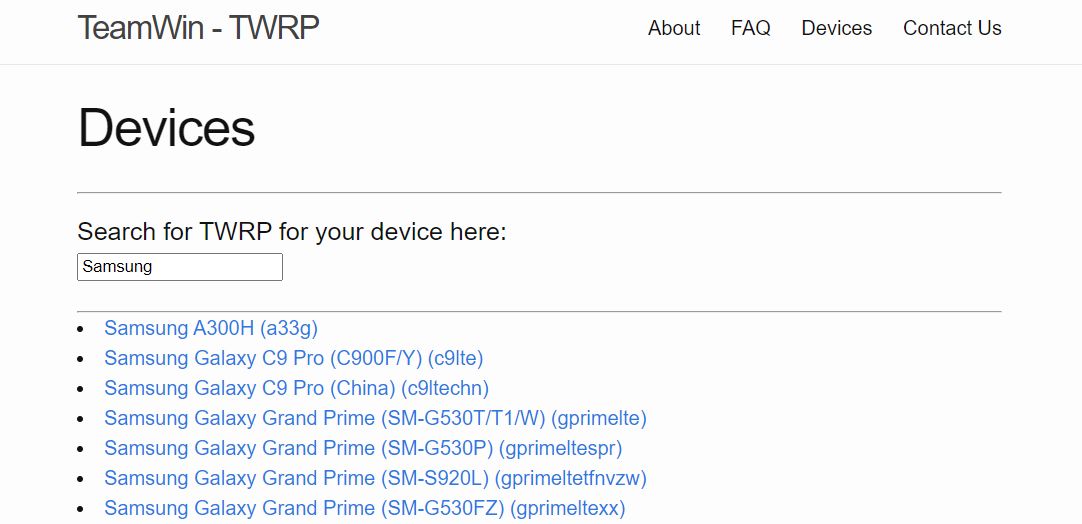
We will be installing Magisk via TWRP. To install TWRP download the zip file from the Official TWRP site. Search for your device model on the site and download the zip. If not found, download the latest version. There are many tutorials on the internet on how to install TWRP. Search how to install TWRP mentioning your phone's brand and model number and you'll get many tutorials.
With TWRP, you can have powerful access to your system. It is an easy alternative to Odin. You can install anything in your device even a new Operating System only with your device. We will talk about it in detail on some other day. For now, let's continue with the process.
Here, I will be using a Samsung Android device and Odin to guide you but for other brands also, the process is not that different. To continue, open Odin on your PC.
Power off your Android device and restart it in download mode. The download mode is generally activated by pressing POWER + VOLUME DOWN + HOME keys simultaneously. The keys may differ for your particular device. Search how you can access download mode for your device.
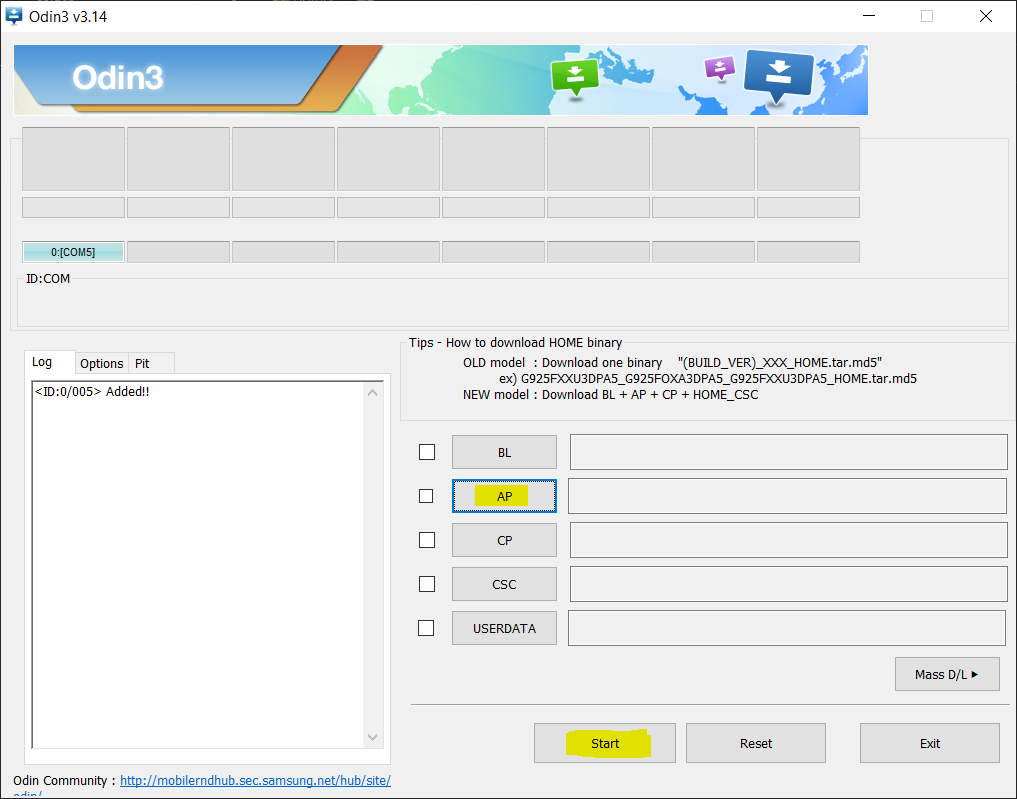
Now connect your phone to the PC with an USB cable. The Odin should show device "Added!" notification. Click on "AP" and browse for the TWRP zip file with extension .tar or .md5 or .zip. Click on start. Wait till the process completes. After the process is completed, your device will restart.
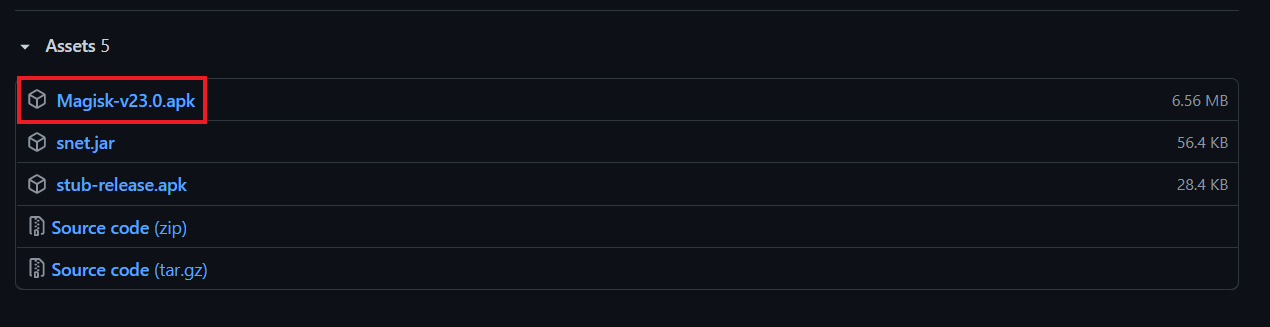
Now download Magisk on your phone. Magisk can be downloaded from its Official GitHub. Download the .apk file from the assets section of the latest release. At the time of this writing, the latest stable released version is v23.0. After the download is successful, change the extension of the file from .apk to .zip. That is, rename the file Magisk-vX.apk to Magisk-vX.zip. If your phone doesn't allow you to do so, use your PC. Copy the zip file into your device, preferably put it on your external SD card if available.
Now, power off your phone again and restart it in recovery mode. To activate recovery mode press, POWER + VOLUME UP + HOME keys simultaneously. The key combination may differ for your device. Just search how you can go to recovery mode on your device.
In recovery mode, TWRP will open.
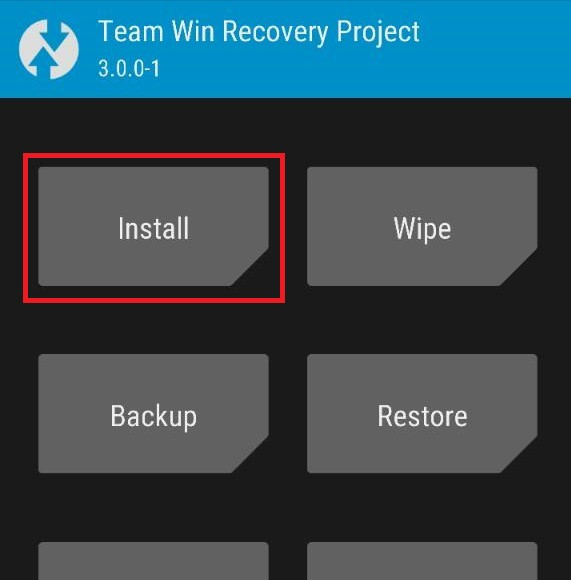
Click on Install. Select the Magisk zip file and slide to flash. Wait till the process completes. After the process is completed, reboot your phone. Upon reboot, you will see a new app, Magisk installed on your system. Open the app and there should be a "Uninstall Magisk" option. If the option is available, you have successfully installed Magisk and now you have root access managed by Magisk.
But sometimes Magisk doesn't get installed properly. If you didn't find the uninstall option, you can install it from the app itself. Open the app and you will see two install options at the top, Magisk and App. Before continuing, check the value of Ramdisk. It must be true, if else, do not proceed further. Click on "Install" in the Magisk section. Click Next and choose Direct Install. Wait till the process completes and reboot your phone.

Upon your next restart, your phone will have root privileges managed by Magisk. Open the Magisk app and explore what you can do with it.
Stuck anywhere? Phone bricked? Let me know in the comments section and I will try to help.
Thank you for reading.
Happy Hacking! ❤️